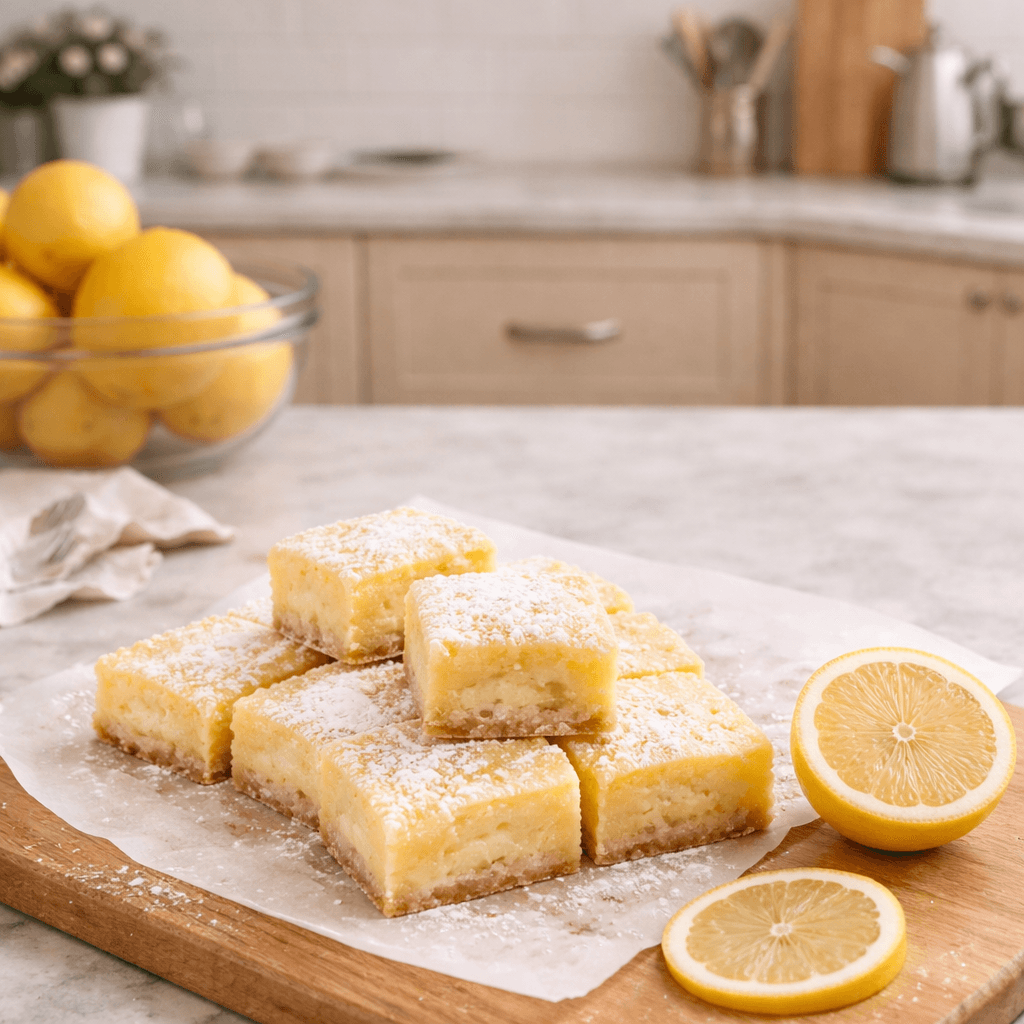
Lazy Day Lemon Cream Pie Bars Recipe
A simple, no-fuss lemon dessert with a buttery base and creamy citrus layer. Perfect for when you want something homemade without the effort.
Ingredients
Equipment
Method
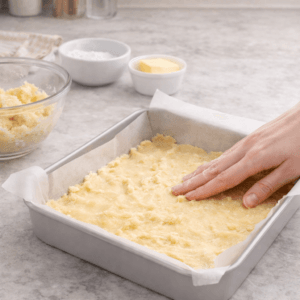
Step 1: Build the Base
- In a bowl, mix flour + powdered sugar.

- Pour in melted butter and stir until it looks like soft dough.
- Press it into your lined baking pan.
- Don’t over-press. I did that once and the crust turned dense instead of soft.
- Bake at 180°C (350°F) for about 12–15 minutes until lightly golden.
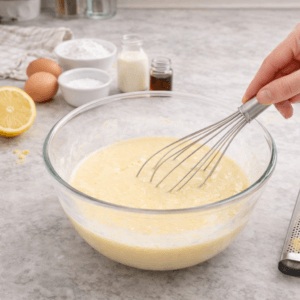
Step 2: Mix the Lemon Cream Layer
- While the base bakes, whisk:
- Eggs
- Sugar
- Lemon juice
- Lemon zest
- Cream
- Flour
- Vanilla
- It should look smooth and slightly runny.
- Smell it—this is when you know it’s going to be good.
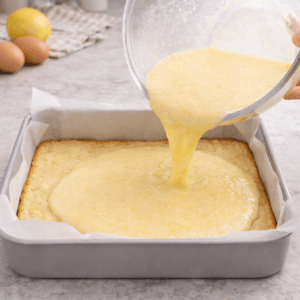
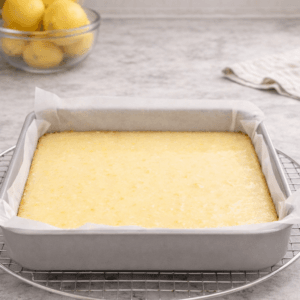
Step 3: Pour & Bake Again
- Take the base out (don’t let it cool fully).
- Pour the lemon mixture directly over it.
- Back into the oven for 18–22 minutes.
- You’ll notice:
- Edges set first
- Center slightly jiggles (that’s perfect)
Step 4: The Hardest Part — Waiting
- Let it cool completely.
- Then refrigerate for at least 1–2 hours.
- I once cut into it too early… it collapsed into a soft mess. Still tasty, but not sliceable.
Notes
Chill well and slice with a warm knife for clean edges.